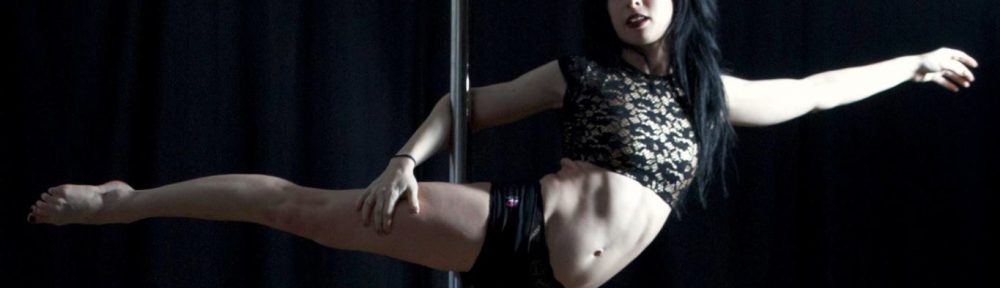
Demystifying Contortion training

Contortion, the art of bending your body into forms you don’t see every day. You’ll find contortionists in Cirque Du Soleil, doing handstands with their feet in front of their faces on top of other contortionists bent into human pretzels. As you watch them in awe, the thought that you could be doing something like that doesn’t even dare to cross your head. I mean, where do you even start?

Can it be just a hobby?

True, traditionally contortionists start their training at a very young age, but even if you didn’t – the ship hasn’t sailed. Just like adult gymnastics is a thing, adult contortion is a thing too. Sports like pole dancing, aerial arts, belly dancing and others got more adults without any background interested in expanding their body vocabulary. My contortion coach says she’s fascinated by training adult bodies and the challenges they pose.

And although the contortionists you see are doing this as their full-time gig, it doesn’t mean you won’t be able to reach a high level of flexibility by keeping it as a hobby. It’s like Olympic lifting, you can be a professional dedicating their life to it, or a Crossfit weekend warrior.

Stretching is all levels

Here’s the nice thing about stretching as a group class activity, advanced students usually work on the same exact exercises as beginners. Most of the stretching positions are attainable at any level, it’s your body that dictates how deep you can go into it before you encounter resistance (that infamous stretching pain). You’ll work on your hamstring flexibility by bending forward to your leg, and so will the girl with the oversplits. If you aren’t as flexible as her, you just won’t bend as far as her, but essentially you are doing the same thing.

That being said, there will be skills which will require some flexibility, body awareness or other skills. Otherwise what would be the fun, right? You’ll need to master basic hand balancing in order to start working on your contortion handstands. You’ll need a decent back, hip and shoulder flexibility before you can grab your leg over your head.

All the stretching and contortion classes I’ve been to were suitable for beginners even when not necessarily being fronted as such. When they are explicitly not, most likely there is a beginner friendly class available in the same place. There are always more beginners than advanced folk, so the market always leans towards beginner training. If the class is working on an exercise you’re not able to do, the instructor will always modify it to your level or have you work on a more basic one.

All the classes that I’ve attended had a wide variety of levels among the students. There were people still working on their flat front splits, those who work on oversplits and everything in between. Those who just started to push up into a bridge, those who work on compacting it and those who hold their ankles in a bridge. Actually, the advanced ones where rarer to encounter in class, and very inspiring to watch.

What happens in class

Let me take you through a typical class so there won’t be anything that mysterious about a contortion class.

You start with a warm-up to get your body ready to work. It usually includes some core conditioning, which is important for backbending. The class will then be divided into two parts, leg flexibility and back flexibility. Some classes/instructors put more stress on one than the other or separate them altogether. In each part, the instructor will take you through a series of stretches and drills. They will come around to correct your alignment and may or may not push you further into the stretches.

Leg flexibility includes working towards flat font splits, middle split, and pancake. You’ll be stretching hamstrings, hip flexors, hip rotators, quads, calves, ankles to name a few. Then you’ll do the splits themselves, sometimes in more than one way. Some classes indulge in frontbending too, which is mostly hamstring and hip flexibility as well.

Back flexibility includes shoulder, spine, and some hip flexibility. For shoulders, you’ll be stretching your lats, pecs, and others for a better overhead position. When it comes to spine flexibility, there’s a more of a progression. Entry level stretch may be cobra pose, camel pose, puppy stretch on the wall and bridges, and as you get better you can push your limits with elbow bridges, hand balances, chest stands, and so on.

Just do it

So even if all these splits and bridges look miles away from you, as you can see the road to them is actually very feasible. When I started working on my flexibility, I was already an adult, and not a tiny bit flexible. I’m almost flat in my splits and I work on my chestands. All you have to do is show up and put in the work, the results will follow.


Mary Nightingale

The Dark Side

When I first began poling, I learned everything on one side. I would invert on my favorite side, do my inside/outside leg hangs on my favorite side and slowly build up my repertoire, on my favorite side.We would laugh about not being able to do simple things on the other side. We would ask our instructor on which side we should go because only one of them was usable. We would write off combos because they made us do a trick on our bad side.

It’s not that we were bad students, and my instructors weren’t bad instructors. There was just very little awareness about balanced training and the dangers of lack of it. The difference between my good and bad sides was huge. At one point I was working on my Iron X, successfully doing handsprings and deadlifting into Brass Monkey on my right while barely holding basic spins on my left.

Even over a year later, when I moved and had a world class instructor, she’d tell me about polers who’d rigorously train their other side like they were some kind of unicorns. I remember her sincerely praising me because I tried my best to work on my Allegra on my bad side once.

As a poler, I grew up training on the side that feels better, and very slowly realizing how it was leading to worse and worse injuries each time. I’m bearing the consequences of not giving my other side enough love. I don’t know know how things are in entry level classes nowadays, I’ve heard they are better, but I know that most polers in my level are really bad about training their bad side.

Some Motivation

Why would we invest time to train the other side too?

Well, let’s start from the obvious and most important one, but also the least motivating reason. We’ll get less hurt, or at least less easily hurt.

Bodies are smart. When one muscle groups can’t handle the load, others pitch in, even if they are not built to do that job. So now we have even more muscles and joints working unevenly, which leads to even more imbalances. Overtrained muscles are more prone to injury. Muscles that are not even meant to do the work they are doing are even more prone to injury. Any injury will snowball across the body in the weirdest patterns which not every PT or RMT can figure out easily, if at all.

Second motivator – time. After enough years, all the time you put into balanced training will diminish the time you spend not being able to do anything at all because your body is broken. Actually, it might save you time in achieving moves too!

If you think about it, the move on your side move still requires your other side to pitch in. Imagine a handspring deadlift. Yes, your upper hands need to pull like crazy to even allow you to hang there, but your lower hand and shoulder work too. What if your lower hand side was as strong as your upper hand side? When I was training my deadlift, my right side was ready, but I was still missing that little push from my left side to make it happen. I could feel it, I could swear that if only I had more strength I’d get it.

And what about all those combos and end up on the other side? Wouldn’t it be nice to just be able to do them? Maybe we are not even learning many combos in class that might cross over to a less convenient side. Maybe we sacrifice our movement vocabulary and fluidity to avoid the inconvenience and pain. We all definitely did that when choreographing a routine. You know, the good old “oh I can’t put this move here, it’s not on my good side”.

No More Bad Sides

Recently, after recovering from an injury, I was advised to take it slow and do more balanced strength work. I came up with a way that would do both of these things at the same time. I decided to do a challenge, where I’ll almost exclusively work on my left side.  I wanted to find all the holes in my left side training and fill them in. I wanted to go back to the very basics, and go through them one by one, and slowly up the level.

I’m about a month in, and it’s so far actually surprisingly pretty fun. I started with all the static spins, the ones I never actually learned properly and now I try to do them over, better. I keep being amazed at my baby-poler self for keeping at it despite the pain because leg holds and pole sits are hella painful. It’s like a trip down memory lane, I get to relive my honeymoon pole days again, where everything was simple yet hard and exciting.

I also decided to take a lower level class, and do everything on my bad side.  I was concerned I’d spend most of the time in despair because I’ll constantly fail to do things I can totally achieve if I just turn around and use the other half of my body. Kind of like you always feel when the instructor says “now the other side!” and you get impatient because things don’t go as well, or don’t go well at all.

But it turned out to be totally the opposite experience. Every class I was surprised at how much I could do on my less dominant side, how not bad at all it was despite the lack of love it got. It’s not easy, mind you, it challenges me enough to be interesting.

My training feels more wholesome now. Less like I’m abusing my body and more like I’m making it stronger in a good way. I love it. So don’t wait for an injury to change your priorities like I did. Decide to have only good sides and #poleonbothsides!

Mary Nightingale.


#marchmiddles summery

When Catie Berier and Jen Crane (AKA Cirque Physio) announced a middle splits Instagram challenge I got excited. Both of these talented ladies not only have middle splits to cry for, but they also work on making other people bendier as part of their job. That’s why I knew this is not going to be another do this random stretch today and another one tomorrow and call it a day, they are going to rock it!

I’m going to keep track of this challenge and add ’em as they come.

https://www.instagram.com/p/BRLuCkkAy8d/?taken-by=cirque_physio

https://www.instagram.com/p/BRYlZ0YgORS/?taken-by=cirque_physio

https://www.instagram.com/p/BRdv3nHgS8K/?taken-by=cirque_physio

https://www.instagram.com/p/BRqh936gcTI/?taken-by=cirque_physio

https://www.instagram.com/p/BRvuxF_g8Nt/?taken-by=cirque_physio

https://www.instagram.com/p/BR6MHLAAPNs/

The end.
Cheers!

What I Learned from My First Competition

Bluetooth Headphones Can Come in Handy

I spent most of my time training with other polers in an open studio hours rather than alone. While I definitely took the liberty to hijack the speakers and play my song out loud (I wonder how many people associate me with that pink panther tune now), it’s definitely not something I or anyone else can do for the entire session.

That’s where having your personal music setup makes a difference. As I don’t have a teeny-tiny ipod-nano-ish music player, and I probably wouldn’t have poled with one clipped on me anyway, I opted for bluetooth headphones.

I got Sony XB50BS EXTRA BASS™ Sports Bluetooth In-ear Headphones on Black Friday for a good discount, but cheaper ones would have probably done the job well too. The sound quality and isolation was good enough that there could be music playing in the studio and people talking, and I could still hear my song clearly and concentrate. The battery life is really good, I only had to charge mine a handful of time and often leave them on during the entire session, multiple times a week.

Being sports headphones as this are, these stayed in place fairly well for the most part. There was a certain moment when I threw myself around in a very strong static spin, where one of the ear pieces would consistently come out. The other issue I had with them, is during a shoulder/chest stand on the floor, where I had to lay on the side of my head and they were really in the way.

All in all a decent investment to do, although not direly needed. I usually had to reference to the song once in awhile, but preferred to work on things without wearing those.

You Either Video or Audio

It could be just an iPhone thing, but I couldn’t play much and video myself at the same time. The music stops as soon as you open the camera, and no, it’s not a bug. There are some apps that claim to allow to video and play music at the same time, but I haven’t gotten around to check them out.

My solution was to dust off my old phone and put my song on it. It has bluetooth, it has Spotify, I don’t care about it – it all works out. As I progressed with my training, I didn’t need to film myself as much, and I could just play music in the studio and film my routine tun with my iPhone as one would usually do.

Talking to Other People Can Save Your Routine

The PSO documentation is pretty good. It covered any question I could have and more. What I missed is the orientation of the poles. Which one is static, the left or the right? The documentation says left, but I didn’t realize I was thinking about the ‘wrong’ left until I went to a group hearsal class and someone pointed it out for me. It messed up my floor pass, since it was going in the direction than I thought, and it was my weaker side of all the moves I intended to do.

It could be reminders to do things, clarifications or just good old sanity checks, but check out what’s the consensus on things from the community can be helpful, if not crucial. If you’re a lone wolf, then checking in with others and making sure your idea of how your routine should be lines up with other people’s expectation can be extra valuable.

Do Privates if you Can’t Work out that Choreo

About a month in, I had a small crisis. I had a routine, not a good one though, with many parts missing or not fitting well. A routine from scratch is a blank board. You can do EVERYTHING, which can be very overwhelming. Suddenly, I couldn’t come up with a single thing I could do on spin pole, even though I know a shitton of moves. Floorwork was even worse, because I haven’t done much of that before.

Even just an hour with a good instructor can make a mediocre imitation of a routine to a full blown piece that I could stand behind proudly. The first thing that my instructor Tiffany Rose Mockler noted, was that my song is short but my routine doesn’t have a lot of judgeable  moves in it. I had too much of pink panther skip-walking,  which is good to character reinforcing but less so for actual content. So on top of filling up missing parts, figuring out the entire floor pass we changed a mistake I was not even aware of.

Bruises Will Happen

I love getting pole kisses, they are badges of honor and testaments that I’ve manage to do something new and cool. When I started getting bruised during competition training, I would put Traumeel to make these fade before I perform. Little did I know, these bruises were here to stay.

Unlike regular training, in competition training you do the same moves over and over again. I kept bruising myself in the same spots before they had a chance to heal, and not even Traumeel is a match to that. The worst one is on my right shin, where I land in a regular climb leg grip from a Shoulder Mount Flip.

Mary Nightingale


Dabbing into Chest Stands

A month and a half ago I was introduced to chest stands in a contortion workshop hosted by Samantha Hall. I never done them before, not really. It was my first time doing a free standing chest stand after I learned the proper technique and safe entrances into the pose. This workshop unlocked a completely new way to work on my back flexibility, free of mental blocks, utilizing my strength and accessing parts of my back I never did before.

Chest Stand is an advanced pose. I strongly advise against attempting it or any of the drills I describe here on your own without proper experience and training. If you freak out, lose control and bail out wrongly, you may sustain serious back and neck injuries.

When I first attempted chest stands at home, I didn’t know what I was doing. My attempts back them felt nothing like the chest stands I did at the workshop. I didn’t know what to engage, I didn’t know I needed to engage at all, heck I didn’t know what’s the proper arm placement.


The arms should be close to the body and very engaged. They need push into the floor just like tricep pushup arms do when the body is close to the ground. My upper back and neck flexibility didn’t allow me to rest my chest on the ground, but even if it did, my arms would still need to push off and allow the core to engage and support the back.

The hands shouldn’t be right under the shoulders. Ideally the shoulders are two of three points of contact with the floor. The neck is the third point of contact. For inflexible folks like me, the points of contact are the chin and hands instead.

There were 3 chest stand drills which we did during the workshop and as homework.

Chest Stand off the Couch

The closer the forearms are to the couch, the easier it is to lift. At the beginning the forearms can be right by the couch.

Start lifting legs up and bend them, body still resting on the couch. After reaching the highest point, engage arms, core and glutes to lift the hips off the couch. Continue lifting the hips up and shifting them forward until you reach your limit.

Note that there is no swinging or kicking. Everything should happen through strength alone.

Chest Stand towards the Couch

After getting a solid comfortable chest stand off the couch, you can start practicing entering the Chest Stand from the floor with a couch spotting you from rolling over.

Face the couch, on your knees, bring chest, neck and arms into a chest stand position just like you do when entering off the couch. Straighten the knees, engage the arms and core and bring one leg up and over the head.

If you are bendy enough then that leg will go far enough for you to counter-balance the grounded leg so that you can just take it off the ground without kicking off. If you are more like me, you’ll need a small kick to get the other leg up.

The couch is there only for spotting, you should not actually rest your feet on it. If it’s too high, use a lower surface for spotting or practice straight leg chest stands.

Chest Stand Toe Lifts against the wall

After getting comfortable with the two above, use this drill to understand the mechanics of lifting the hips and bringing them over your head.

Start facing the wall, and being as close to it as possible (or in Samantha’s words -“really eat the wall!”). Get up into a chest stand, just like you did toward the couch, but keep the legs straight. Put the toes on the wall and try to lift them up while keeping the shoulders fairly stationary. Relax down, and repeat a couple of times.

It was a little weird for me at first, but after a few times it somewhat clicked. I like to pretend I’m trying to sit my butt on the wall above my head, which makes me lift more with the hips than the chest. After doing this one, I find that I can get into a deeper chest stand off the couch and see my toes.

After 6 weeks of classes and home practices, I’m able to enter a chest stand off the ground, with minimum kicking, without any spotting of any kind. I’m feeling very comfortable in it and I can even breath (something we can’t take for granted in back bends!). Despite such a short period of time, I made noticeable progress.

Can’t wait to see where will this new skill get me!


Glute Strengthening for Better Hip Extension

During my endeavor to fix my APT, I was looking for exercises that strengthen the glutes in the position where the hips are not flexed. I needed stronger glutes to counteract the tight hip flexors I have from sitting at the computer all day writing these posts (and also doing my actual day job). The result was a series of exercises I put together which focused on developing glute strength during hip extension.

Why don’t you just do squat?

Yes, squats are the first thing that comes to mind when one combines the words ‘glutes’ and ‘strengthening’. My main reason for avoiding squats was that they work on strengthening the glutes during hip flexion, while I was looking for stronger glutes for hip extension.

Short term benefits and uses

I do this routine as part of my warm up for the hips. It doesn’t require much of a warm up to do (if at all), it’s very short and gets my hips moving. It’s very hard to fatigue the glutes even with serious weight training, so I feel safe doing it daily without adverse consequences. It’s also a great quick warm up in itself if I only want to stretch the hip flexors afterwards.

Long term benefits

Aside from getting my hips warm and tired, this little routine has also a long term benefits. It develops strong glutes when the hips are extending, which means better active flexibility, more persistent flexibility gains and even better cold flexibility. And as an added bonus, it makes your butt fill in those jeans nicely. I was hesitant to make these claims until I started to see improvement in my hip flexors (and butt roundness) on myself. Of course, your mileage may vary.

Proper glute bridge form

One of the first things I noticed when I google-researched glute bridges was that I was doing them all wrong. I used to think that the high I can get my hips the better. My back was very arched, hips in an APT and no feeling whatsoever in the glutes.

A proper glute bridge consists of 0% back flexibility. You should be a straight line from neck to knees. The front of the body should be shortened, hips tucked under and the back long. Imagine a laser beam coming out of your bum hole, you try to point it up to the ceiling while keeping the hips high, that’s pretty much how it feels.

How much

I started doing this quite a few months ago as part of my APT elimination plan. For the first month I did it pretty much every day along with hip flexor stretching and lower abs strengthening. I saw a nice improvement with my APT, so I tried to keep that new baseline while directing my attention to other things. I was shooting for 10 reps of each exercise at the time.

Nowadays, I don’t do it every day, but try to squeeze it in before each training (4-6 times a week), and I upped my reps to 15-20. Sometimes I use a resistance band over my hips in the glute bridges to up the ante, but I’m not consistent with that yet. Incorporating ankle weights may be another idea as I’m not too big on reps.

The recipe

  • Glute bridge : 10-20 reps
  • Glute bridge pulses at the top : 5-10 reps
  • One legged glute bridges : 10-20 reps/side
  • One legged glute bridges leg movement at the top : 5-10 reps/side
  • Donkey Kicks : 10-20 reps/side
  • Donkey Kicks over other leg : 10-20 reps/side
  • Straight leg raises with hollow body : 10-20 reps/side
  • Bent leg raises with hollow body : 10-20 reps/side
  • Downward facing dog leg rises : 10-20 reps/side

I have some additions and variations I play with but this is the original routine.

Mary.


The Middle Splits Challenge

A week ago my beautiful bendy friend Ronnie broke the news to me – she lowered down into her first full flat middle split. She attributed her success to Fit & Bendy’s Bendy Body DVD, an active flexibility workout which I suggested to her. But it was just one last piece she was missing in a puzzle she was working on for a long while.

I was quite inspired by her and her success story, inspired to face my currently most inflexible aspect of my body, my own middle splits. I started off with what seems like 90 degrees, and slowly, very slowly didn’t get much better like I did with my front splits, pancake and backbends. I avoided dealing with them, and they weren’t a priority.

I asked Ronnie what routine should I do, and being the bendy goddess and sweetest person that she is, she shared a plan of action with me, one which I decided to take on as a challenge. I’ll no longer avoid my middle splits, I’ll actively put work in them for a month and see how I feel about them.

My plan is to do this 3 times a week. I already did this routine last week, and it seems to take half an hour, which is totally feasible for me.

The Routine

  1. Hip warm up – my glute strengthening hip flexor extending butt shaping routine
  2. Standing leg kick to the side
  3. Leg kicks while laying on the side
    1. Propped on the elbow
    2. Head on arm on the floor
    3. Prop back onto the elbow, bring knee to shoulder, grab the ankle and extend leg.
  4. Leg turnout – Standing on all four, extend a leg to the side.
    1. With toe on the ground, turn it in and out.
    2. In a turned out position, do leg lifts.
    3. In the air, turn it in and out.
  5. Standing/seating pike
  6. Butterfly pose
  7. Straddle stretches with feet on blocks
    1. Bend sideways to each leg.
    2. Fold towards on each leg.
    3. Fold forward into a pancake
  8. Pancake split
  9. Weighted reclined splits. Put ankle weights on and lay on the ground.
    1. Slowly open and close the legs
    2. Add resistance bands on each leg, hold them with the hands, put a block under the butt and resist the bands in pulses.
  10. Weighted wall splits. With the ankle weight still on, move butt to wall.
    1. Lay on back
    2. Prop up onto the elbows
    3. Prop up on the hands and push chest to wall
    4. Slowly slide feet down and get to a seated position
    5. Push chest to wall again
  11. Descend to middle split using a pole
    1. Stand face to pole, turn feet out and start sliding them out flexed in stright line.
    2. Keep crouch close to pole and slide until legs start to go forward into a straddle.
    3. Stop and point toes and hold.
  12. Frog and half frog
  13. Middle split


A Year of Bridges

So about a year ago I took my first private with my contortion instructor Samantha Hall. She opened my eyes about two things:

  1. It’s not about the straight legs. I thought I needed to get to the point where my legs are straight before walking them closer to my hands. I kept working on pushing with my legs and eventually managed to straighten them, but my progress was not very fast overall. Sam told me right away that the legs are not important here, and walking them closer is essential for progress.
  2. It is about the shoulders over hands. Being able to lock out my legs in my very wide initial stance is all fine and dandy, but the whole point of pushing the weight toward the hands is to get the shoulders over them. It brings more bend to the upper back and shoulder and evens out the pressure throughout the spine. She introduced me to the chest to wall bridge which felt impossible that that time.

During the last year my back have been though quite a lot. I gained understanding in how to mobilize my upper back, started to actively put in work to open my shoulders, stretched my hip flexors while strengthening my glutes, dubbed into chest stands, and got serious about my bridges and getting more comfortable in them.

I addressed the two points I listed above by working on compacting my bridge and working on the chest to wall bridge. This, along with better shoulders and the ability to tap into my upper back more, are probably the biggest contributors to my progress.

I remember thinking that that’s as good as my bridge is going to be, and I now I feel the same way about my current picture. Silly, I know. Especially since I’m not planning to stop any time soon. I’ll get that chest on the wall, heels down, this year for sure.

Actually, I can’t imagine how is it going to look a year from now.

Mental Blocks in Training

When I was a kid I was told that when a man beats up a puppy, no matter how big and powerful of dog it will grow to be, it would still fear that man. Although I’m not certain about the truthfulness of this statement, I’m pretty sure the same happens to us too. If we have negative experiences with something, it might shape our notion of it for a long time.

When I first started poling, I discovered my hands and feet were abnormally sweaty, more than regular grip aids can handle. I had Mighty Grip gloves so I could grip with my hands, but my feet were still bare. It didn’t bother me until we started learning The Cupid. That foot on pole point of contact made sure I stood no chance in sporting a beautiful floating Cupid.

I avoided it as much as I could. The closest I got to working on the Cupid was when I revisited the ankle on pole variation. I nailed that bad boy down with the less usable grip, long after I nailed much more advanced things, and kept on avoiding Cupids.

A lot have changed since than, but in my head Cupid was still the big scary man that would beat me up.

Fear is the mind killer.

Last week I trained with a lovely instructor named Julie. Julie, as I heard before had a sweaty hands and feet problem as well, and I have seen her compete Pole Expo’s Pole Classic competition. I’ve also seen her online tutorial on a cool transition from Cupid to De Janeiro, and was happy she chose to teach it that day.

When she spotted me, the Cupid was the hurdle I couldn’t get over. I asked her how did she do it, and she said that I didn’t had to stay in the Cupid, just enter it and bend back to catch the pole. I realized that more than my actual ability to do it, it was a mental block I had in my head which prevented me from getting it. I was perfectly able to put my foot on the pole, and catch it behind me as my foot was sliding off. My brain was the one that’s preventing my from going there, because once upon a time when I was a clueless little beginner, I couldn’t do it.

I’m all about figuring out fears and actively working on them to be able to succeed in my training. Fear is a big part of many moves on pole, and rationally addressing it can be very effective. What dawned on me is that there is another type of fear, the one that you don’t know exists, the one that hold you back without you being aware of it so you don’t even know you need to fix it.

On Saturday, in the contortion workshop I take, we were warming up our backs with simple backbends, working our way up towards the mighty chest stand. We did assisted drop to bridge, which I felt awful about and I was doing my best to contain my frustration in. I was almost holding back tears, yet I refused to understand why.

Back bending is, or at least used to be, a hard uphill battle for me. My back was never flexible, my shoulders got even tighter because I haven’t stretched them for the first year and a half of my pole training. Everything about it was hard and frustrating, and I failed to enjoyed it like some flexy people say they so. I was still too stubborn, so I never gave up. I wanted that Cocoon, and that Crescent Moon and many other pretty things.

But when we moved on to the chest stand, I was at the grown ups’ mat, holding it and calmly working on deepening it. No frustration, no pain, no tears held back, just doing it. Chest stand was one of the things I thought were too advanced for my stiff back so I haven’t touched on it before much. Until this workshop.

Until I practiced a new back bend which was free of my biases.

Until this one instance with the Cupid where I realized mental blocks were a thing.

Until I realized I wasn’t a beat up puppy anymore, I’m a huge ferocious hound now.

These back bends got nothing on me. This is not a problem I can’t train through. Once I can free my mind from this notion, my body will be capable to go there. This makes me feel pumped to get back to my backbend training. Feel empowered.

I’ll keep looking for more mental blockers in my training, and undo them one by one.

2016 going to be amazing.